Beginner Crochet Octopus Pattern PDF⁚ A Comprehensive Guide
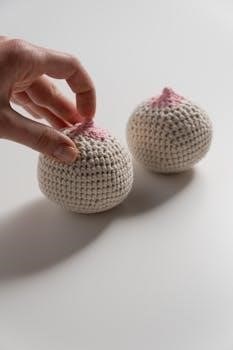
Embark on a delightful journey into the world of amigurumi with our comprehensive guide to beginner crochet octopus patterns! Discover easy-to-follow PDF tutorials, perfect for crafting adorable, huggable cephalopods, even with minimal crochet experience. Get ready for a fun and rewarding project!
Crochet octopus amigurumi has surged in popularity, captivating crafters with its charm and therapeutic benefits, especially for premature babies. The curly tentacles mimic the umbilical cord, providing comfort and security. These adorable creations are not just toys; they are sources of solace.
The appeal lies in their simplicity and versatility. Beginner-friendly patterns are readily available, often in convenient PDF format, guiding novices through each step. These patterns usually involve basic crochet stitches, making them accessible to all skill levels.
Furthermore, the customization options are endless. From vibrant colors to unique embellishments, each octopus can be tailored to individual preferences. Many patterns even incorporate no-sew techniques, streamlining the process and minimizing complexity.
Whether you seek a relaxing hobby or a meaningful gift, crochet octopus amigurumi offers a rewarding experience. The joy of creating something special with your own hands, combined with the potential to bring comfort to others, makes this craft a truly worthwhile endeavor. Join the growing community of octopus enthusiasts and discover the magic of crochet!
Materials Needed for a Beginner-Friendly Octopus
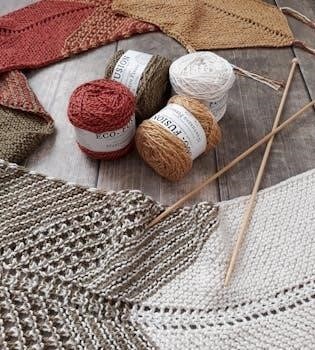
Embarking on your crochet octopus journey requires gathering essential materials. First, select yarn in your preferred colors. Worsted weight yarn is ideal for beginners, offering a balance of thickness and ease of use. Cotton yarn is a popular choice, known for its softness and durability, perfect for creating cuddly amigurumi.
Next, choose a crochet hook that corresponds to your yarn weight. A 3.5mm or 4.0mm hook typically works well with worsted weight yarn. Ensure the hook is comfortable to hold for extended periods.
You’ll also need fiberfill stuffing to give your octopus its plush form. Safety eyes, available in various sizes, add character, but embroidery floss can be used for a safer, baby-friendly alternative. A yarn needle is crucial for weaving in loose ends and attaching any additional features.
Scissors are indispensable for cutting yarn, and stitch markers help keep track of your progress. Finally, a printed or digital copy of a beginner-friendly octopus pattern PDF will guide you through the process. With these materials in hand, you’re well-equipped to create your own adorable crochet octopus!
Basic Crochet Stitches for Octopus Creation
Creating a charming crochet octopus primarily involves mastering a few fundamental crochet stitches. The magic ring, also known as the magic circle, is the starting point for most amigurumi projects, providing a seamless and closed center for the octopus’s body. Single crochet (sc) is the workhorse stitch, forming the dense fabric needed for a well-shaped amigurumi.
Increase (inc), typically achieved by working two single crochet stitches into one stitch, expands the circumference, shaping the octopus’s head and body. Decrease (dec), often executed using the invisible decrease technique, reduces the number of stitches, creating curves and closing off sections.
Chain stitch (ch) is used for creating the starting chain and sometimes for decorative elements. Slip stitch (sl st) joins rounds and finishes off sections neatly. Understanding these basic stitches is key to successfully crocheting an octopus.
Many beginner-friendly patterns use US crochet terminology. Practice these stitches beforehand to build confidence. With consistent tension and careful counting, you’ll find these stitches become second nature, enabling you to create a delightful crochet octopus with ease.
Step-by-Step Instructions for the Octopus Body
To begin the octopus body, start with a magic ring. Round 1⁚ Work 6 single crochet stitches into the magic ring. Pull the tail tight to close the ring. Round 2⁚ Increase in each stitch around (12 stitches). Round 3⁚ Single crochet in the next stitch, increase in the following stitch; repeat from around (18 stitches).
Round 4⁚ Single crochet in the next 2 stitches, increase in the following stitch; repeat from around (24 stitches). Continue increasing in this manner, adding one more single crochet stitch between each increase in each round, until you reach the desired width for the body.
Once the base is wide enough, begin working even rounds of single crochet stitches without any increases to form the main body. The number of rounds will determine the height of your octopus. Ensure consistent tension for a smooth, uniform shape.
As you approach the end, begin decreasing to shape the top of the body. To decrease, single crochet two stitches together. Decrease evenly around until the opening is nearly closed. Stuff the body firmly with fiberfill before completely closing. Finish with a few more decrease rounds, then fasten off and weave in the ends.
Creating the Crochet Octopus Tentacles
To begin crafting the tentacles, chain a length appropriate for your desired tentacle size. A good starting point is 40-50 chains; Then, starting in the second chain from the hook, work 3 single crochet stitches into each chain. This will create the signature spiral curl of the octopus tentacle.
Repeat this process until you have created eight individual tentacles. For variation, you can experiment with different chain lengths to make some tentacles shorter or longer than others. You can also try using different numbers of single crochet stitches per chain to adjust the tightness of the spiral.
If you prefer a different texture, consider using half double crochet or double crochet stitches instead of single crochet. Just remember to adjust the number of stitches per chain accordingly to achieve the desired curl. For example, with double crochet, you might use 2 stitches per chain.
Once all the tentacles are crocheted, fasten off each one, leaving a long tail for attaching them to the octopus body. Weave in the starting chain tail, but leave the long tail for sewing. Consider blocking the tentacles to help them hold their shape before attaching them to the body.
Assembling the Octopus⁚ Attaching Tentacles
With the body and tentacles now complete, the next step involves carefully attaching the tentacles to the base of the octopus body. Begin by positioning the tentacles evenly around the open end of the body, ensuring a balanced and aesthetically pleasing arrangement. Use the long tails left on each tentacle for secure attachment.
Using a yarn needle, weave the tail through the stitches of the tentacle and the corresponding stitches on the body. For a secure hold, sew each tentacle in place using a whip stitch or a mattress stitch. Ensure that the stitches are tight enough to prevent the tentacles from detaching, but not so tight that they distort the shape of the body.
Consider attaching the tentacles slightly inside the edge of the body to create a more defined shape. As you sew, periodically check the overall appearance of the octopus to ensure that the tentacles are evenly spaced and properly aligned. Adjust as necessary to achieve the desired look.
Once all the tentacles are securely attached, weave in any remaining ends of yarn to conceal them within the body. Give the octopus a gentle squeeze and tug on each tentacle to ensure that they are firmly in place. Your octopus is almost complete!
Adding Features⁚ Eyes and Embellishments
Now that your octopus is assembled, it’s time to bring it to life with the addition of eyes and other embellishments. The eyes are crucial for giving your amigurumi character and personality. You have several options for eyes, including safety eyes, embroidered eyes, or crocheted eyes.
Safety eyes are plastic eyes with a backing that locks them securely in place, making them ideal for toys intended for older children. Embroidered eyes, using yarn or embroidery floss, are a safer option for babies and young children. Crocheted eyes can be made separately and then sewn onto the octopus.
Position the eyes carefully on the head of the octopus, ensuring they are evenly spaced and symmetrical. For safety eyes, follow the manufacturer’s instructions for attachment. For embroidered or crocheted eyes, use a yarn needle to sew them securely in place.
Once the eyes are attached, consider adding other embellishments to further personalize your octopus. You can add a small crocheted bow, a cute hat, or embroidered details such as eyelashes or a smile. Get creative and let your imagination guide you!
Remember to securely attach all embellishments to ensure they do not pose a choking hazard for young children. With the eyes and embellishments in place, your crochet octopus is now complete and ready to be loved!
No-Sew Octopus Pattern Variations
For those who dislike sewing or are looking for a quicker project, no-sew octopus patterns offer a fantastic alternative. These patterns are designed to minimize or eliminate the need for sewing by cleverly integrating the tentacles into the body during the crochet process.
One common technique involves crocheting the tentacles directly onto the base of the body as you work in rounds. This creates a seamless connection, eliminating the need to sew them on later. Another approach involves creating the tentacles as part of the initial magic ring, which are then worked into the body as you progress.
No-sew patterns often utilize clever shaping and stitch placement to achieve the desired octopus form. The body and tentacles may be worked in a continuous spiral, with increases and decreases strategically placed to create the rounded body and curly tentacles.
Despite being no-sew, these patterns can still produce adorable and well-formed octopuses. They are particularly popular for creating small, quick projects, such as keychains or baby toys. The lack of sewing makes them ideal for beginners or those who simply prefer a faster, more streamlined process.
When searching for no-sew octopus patterns, be sure to carefully review the instructions to ensure they align with your skill level and preferences. With a little practice, you’ll be able to create charming, no-sew octopuses in no time!
Free PDF Patterns and Resources
The internet is a treasure trove of free crochet patterns, and beginner-friendly octopus patterns are no exception. Numerous websites and blogs offer downloadable PDF patterns that you can access without any cost, allowing you to start your crochet project immediately.
Websites like Ravelry, LoveCrafts, and various crochet blogs are excellent starting points for finding free octopus patterns. These platforms often feature a wide range of designs, from simple and basic to more elaborate and detailed.
When searching for free patterns, pay attention to the skill level indicated. Look for patterns labeled “beginner-friendly” or “easy” to ensure they are suitable for your current crochet abilities. Additionally, check the pattern’s instructions and diagrams to get a sense of its complexity before downloading.
Many free patterns come with step-by-step instructions, photos, and even video tutorials to guide you through the process. These resources can be invaluable, especially for beginners who are still learning the ropes.
In addition to free patterns, there are also numerous online resources available to help you with your crochet journey. Websites like YouTube and crochet communities can provide tutorials on basic stitches, tips for troubleshooting common issues, and inspiration for your projects.
By taking advantage of these free PDF patterns and resources, you can embark on your crochet octopus adventure without spending a dime. Happy crocheting!
Tips for Beginners and Troubleshooting
Starting your crochet journey with an octopus amigurumi can be exciting! Here are some tips to make the process smoother. Firstly, choose a pattern specifically designed for beginners. These patterns use basic stitches and clear instructions, minimizing frustration.
Secondly, practice your tension. Consistent tension creates a neat and even fabric. If your stitches are too tight, the octopus will be small and stiff. If they’re too loose, it will be floppy and uneven.
Thirdly, don’t be afraid to frog (rip out) your work! Everyone makes mistakes. Frogging allows you to correct errors and learn from them. Use stitch markers to keep track of your rounds, especially when working in the round.
Next, if you’re struggling with a particular stitch, watch video tutorials. Seeing the stitch being made can be much clearer than reading instructions.
If your octopus is turning out too small or too large, check your yarn and hook size. Using the recommended materials is crucial for achieving the intended size.
Lastly, if you encounter any problems, don’t hesitate to seek help from online crochet communities. Experienced crocheters are often willing to offer advice and support. Remember, practice makes perfect, so keep crocheting, and you’ll create a beautiful octopus in no time!